Edible Glitter?? Yes Please!If you scour Pinterest like I do, you may have stumbled upon a post that reads something like "Oh my God, I just died... DIY edible glitter". Well, I have to admit, my inner child screamed with joy when I read that. Then, I read the "recipe" and knowing what I know about baking and cooking, I was skeptical but I wanted to be hopeful. I had to put this to the test. You won't want to miss these results. 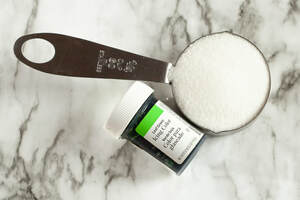 People use what's known as "click bait" in the subject titles all the time just to get viewers to open their posts. Could this just be click bait? IS it possible to make edible glitter? I HAD to find out. The recipe called for 1/2 cup of sugar and 5-10 drops of food coloring. I used 1/4 cup of sugar and a few drops of food coloring because if this was a fail I didn't want to waste more ingredients than I needed to. 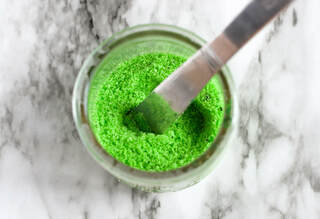 The recipe then said to mix the sugar and food coloring, spread on a cookie sheet and bake at 350 degrees for 10 minutes. Then, break up and bake another 10 minutes. Let's give it a shot! I wasn't sure exactly how this was going to work. Heat makes sugar melt. Would it miraculously make it shiny first? I didn't think so... 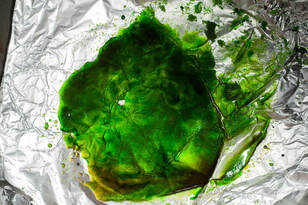 It melted... Into a mess... I'm glad I put the sugar on top of some aluminum foil or I would have had a ruined cookie sheet on my hands. 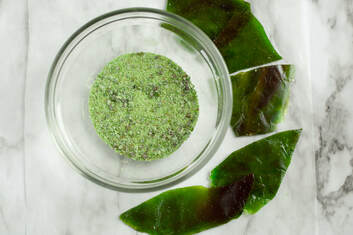 I let the "glitter" mess cool and then I broke it up. I tried grinding some into small glitter- sized pieces and while it is slightly reflective, I can safely say this is NOT home made edible glitter. All is not lost however. This could be useful in some of your decorating. If you use blue food coloring this could be ice or water. This would also nice geode shards for geode cakes, which are extremely popular now. 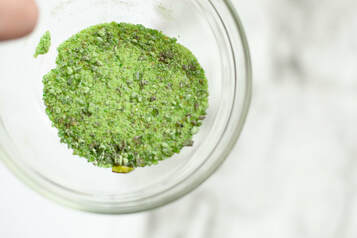 I will continue my quest for DIY edible
glitter and keep you posted if and when I am successful. Just goes to show, I guess you can't believe everything you read on the internet.
2 Comments
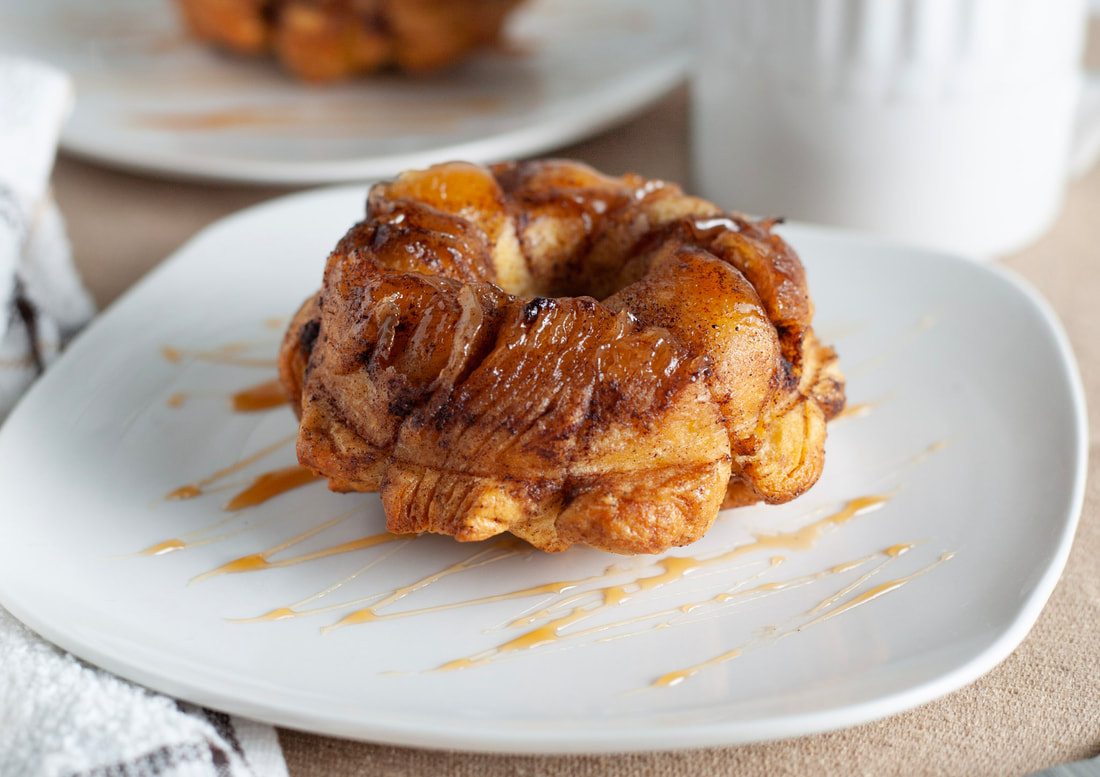 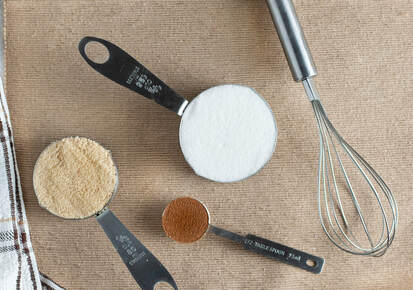 So I just started making this recipe a month or so ago and I have been requested to make multiple times since. It never lasts for very long when I make it and I'm lucky if I get A lot of recipes I found for monkey bread are for THREE tubes of ready to bake biscuits which is fine if you're hosting a huge party but if its Sunday afternoon and you want to make a simple, delicious treat for your family, this is the recipe for you! My boys don't actually like their monkey bread too sweet but if your family loves the sweetness, you may want to increase the sugar amount below to 3/4 cup- 1 cup. I also really like making my monkey bread in silicone donut molds. I find they cook quicker, more evenly and you end up with a single serve size treat. Enjoy! (Start by pre-heating your oven to 350 degrees) Ingredients: *1 can/ tube of pre-made biscuits. (Most recipes with steer you away from the flaky biscuits but to be honest, Iused them once by accident and I really liked it!) *1/2 cup of granulated sugar *1/4 of packed brown sugar *1 tsp- 1/2 tbl of cinnamon (I always use 1/2 tbl but not everyone loves cinnamon as much as I do) *1 stick of butter (unsalted) donut mold or small bunt pan. To start, cut the biscuits into 8ths. I like to use my bench scraper to section out my biscuits instead of a knife. It's much easier. Next, melt the butter. You can do this on the stove but it's much easier to use a glass bowl and the microwave. Then add in the dry ingredients to the butter. After the sweet buttery mixture is made, you'll need to smoosh the sectioned biscuit pieces into a ball-like shape, Some recipes tell you to roll them into balls but if dough gets worked too much it can become tough. Then you'll want to coat the biscuit balls with the mixture and pack into the molds. You'll want to divide the remaining mixture into the molds. I find this amount makes 5 servings when you pack the molds tightly. Place the mold on a baking sheet to avoid spill over. Bake at 350 degrees for 20 minutes to start. Bake until tops are golden brown. Let cool before removing from molds and enjoy! 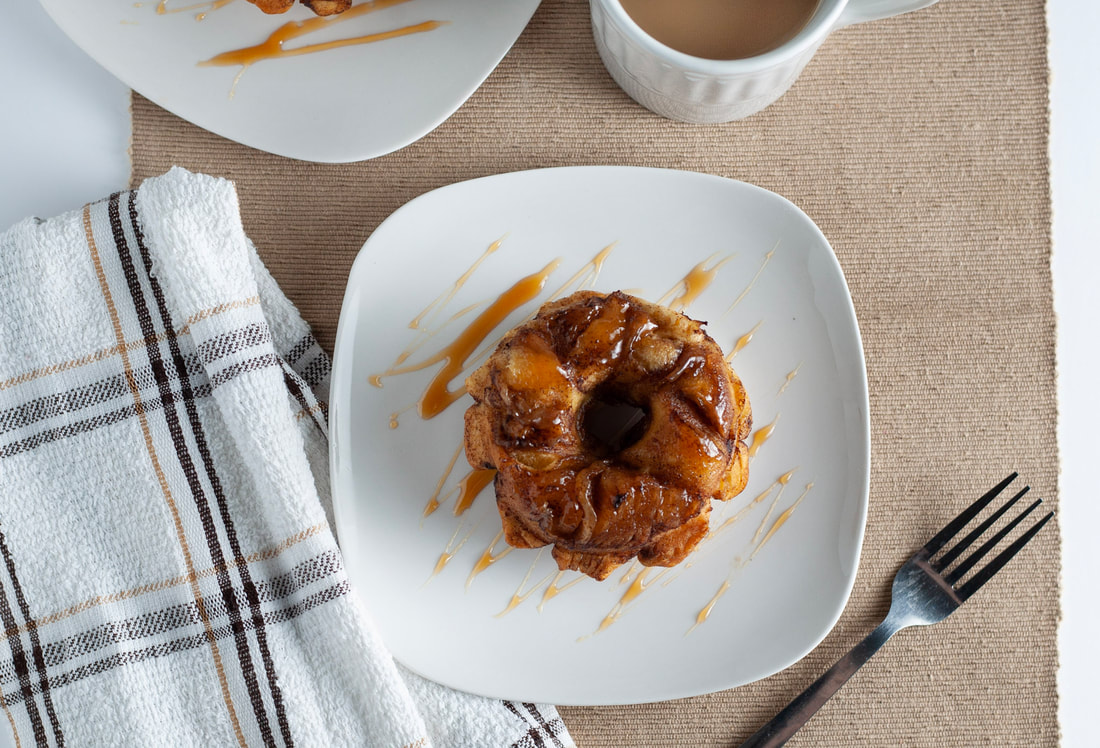
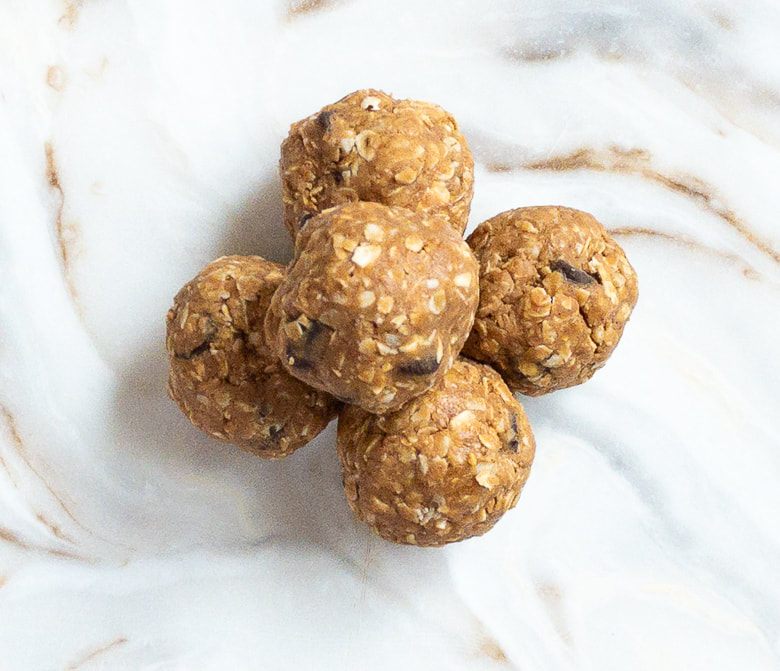
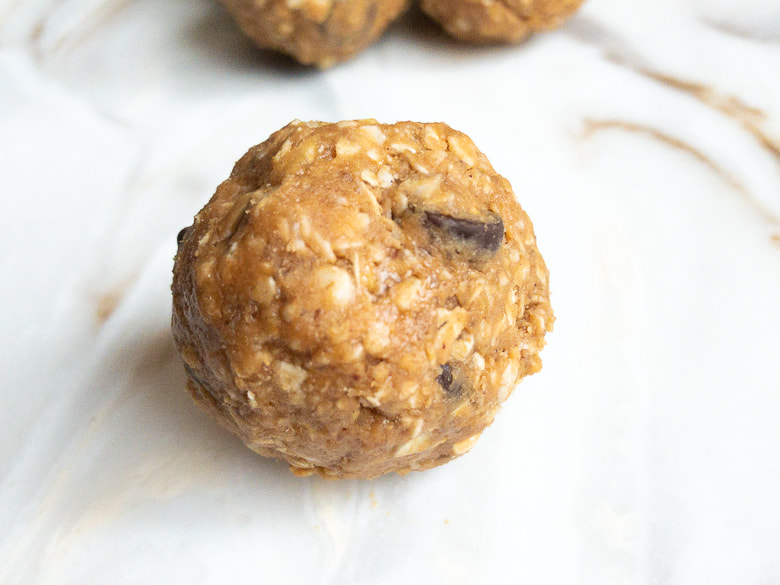
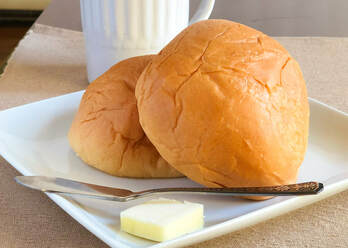 One of my son's favorite breakfasts is Portuguese sweet bread. If you don't love it, you're not really Portuguese. 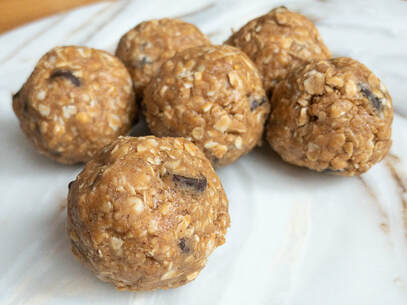 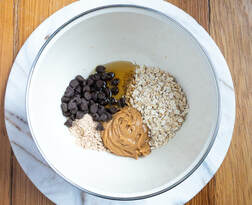 This recipe comes in so handy for me and I use it all the time! I even made these for the Super Bowl party I went to this year and they were a huge hit. These protein balls are quick and easy to make and super tasty, even kid-approved. Let's get to it! Ingredients: 1/2 cup PB 1 cup instant/quick oats 1/3 cup honey 1/2 semi sweet chocolate chips (the mini ones work best) 1 tsp vanilla extract 1 tablespoon Pb or vanilla protein powder (optional) 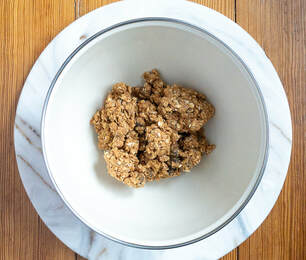 Directions: Mix all ingredients together in bowl until combined the roll into 1”balls then enjoy!
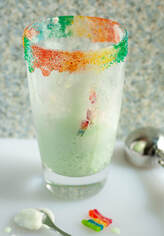
I LOVE MARCH! March means spring is not far off and I can put my snow shovel away (actually, I am writing this on March 4th and home due to a snow day, this IS New England after all). March also means Shamrock Shakes at McD's which happen to be my FAVORITE but I don't know about you but I think the presentation has lots of room for improvement. Below is my version of my favorite milkshake. Enjoy!  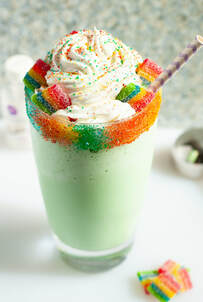 Ingredients: 1 cup of milk (2% or 1% works well) 2 scoops of vanilla ice cream 1 tbsp peppermint extract 2 drops of green food coloring whipped cream Directions: Blend all ingredients together in a blender. Have fun decorating you glass! I lined the rim of my glass with honey and coated it with rainbow colored sugar. Then pour in your blended shake and top with whipped cream. Airhead Sour Extreme Bites added just a little more rainbow magic to my shake. Keep out of reach of leprechauns!
|
by Kelly SmithI am a photographer who loves to bake (and eat)! Join me as I share some of my favorite recipes and local New England food. Archives
April 2020
Categories |


 RSS Feed
