 In a time of uncertainty and change, we all have many different struggles. Some are home, alone and isolated, some of us are working from home, trying our best to fill-in for trained, amazing teachers, keeping our household stocked with supplies when possible and still saying sane and positive. Others are bravely heading out to work stocking shelves, delivering food/ supplies and working in the medical field to help keep all of us safe. We may not be able to dine in our favorite restaurants right now but we can still enjoy some delicious comfort food that is simple enough to make while juggling multiple roles. I hope this recipe makes an easy dinner for your family and brings a smile to your household. Remember to be kind to yourself and breathe during all of this. It's new to all of us so be patient and kind to your family, those around and most importantly, yourself.
Directions:
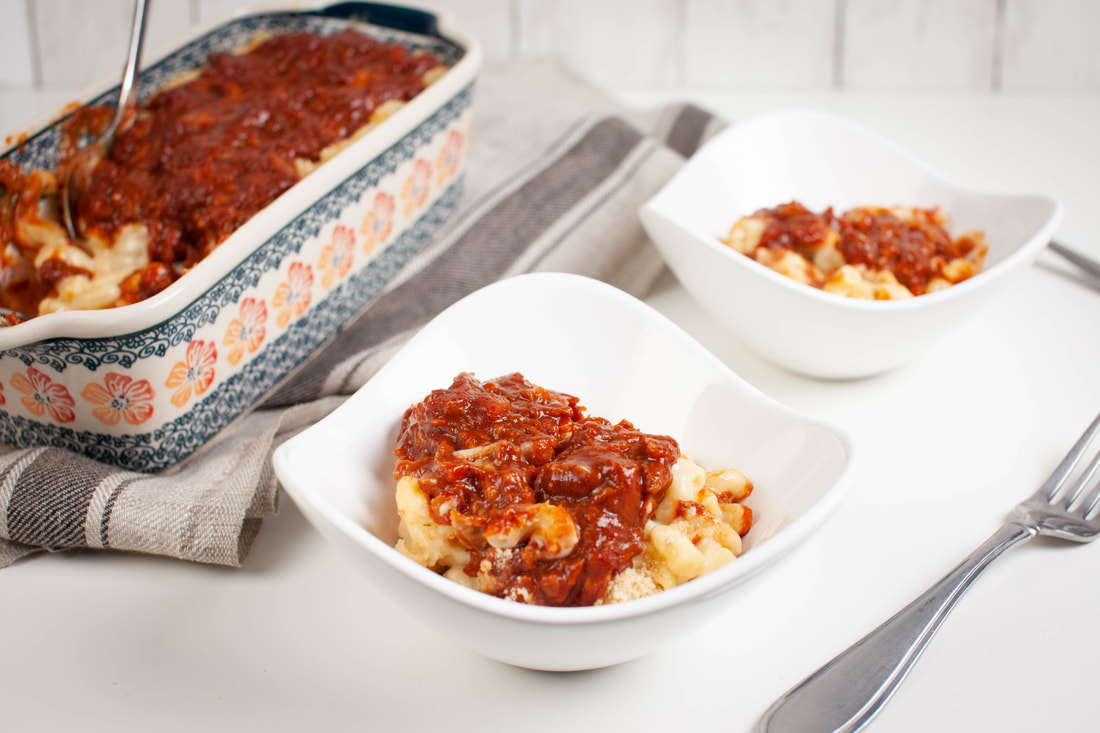
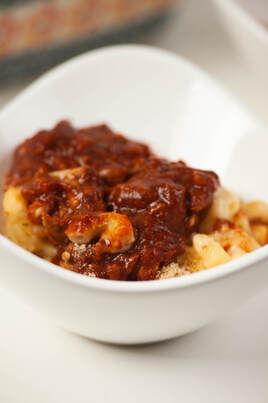
First, bring a large pot of lightly salted water to a boil. Cook elbow macaroni in the boiling water, stirring occasionally until cooked through but firm to the bite, 8 minutes. Drain and set aside. Next, melt butter in a saucepan over medium heat; stir in flour, salt, and pepper until smooth, about 5 minutes. Slowly pour milk into butter-flour mixture while continuously stirring until mixture is smooth and bubbling, about 5 minutes. Add both cheeses to milk mixture and stir until cheese is melted, about 2 to 4 minutes. Fold macaroni into cheese sauce until coated. Add to casserole dish or loaf pan and sprinkle top with bread crumbs. Finally, layer pulled pork across the top of mac and cheese and place in the oven to bake for 10 minutes. Let cool for 2-5 minutes and ENJOY!
0 Comments
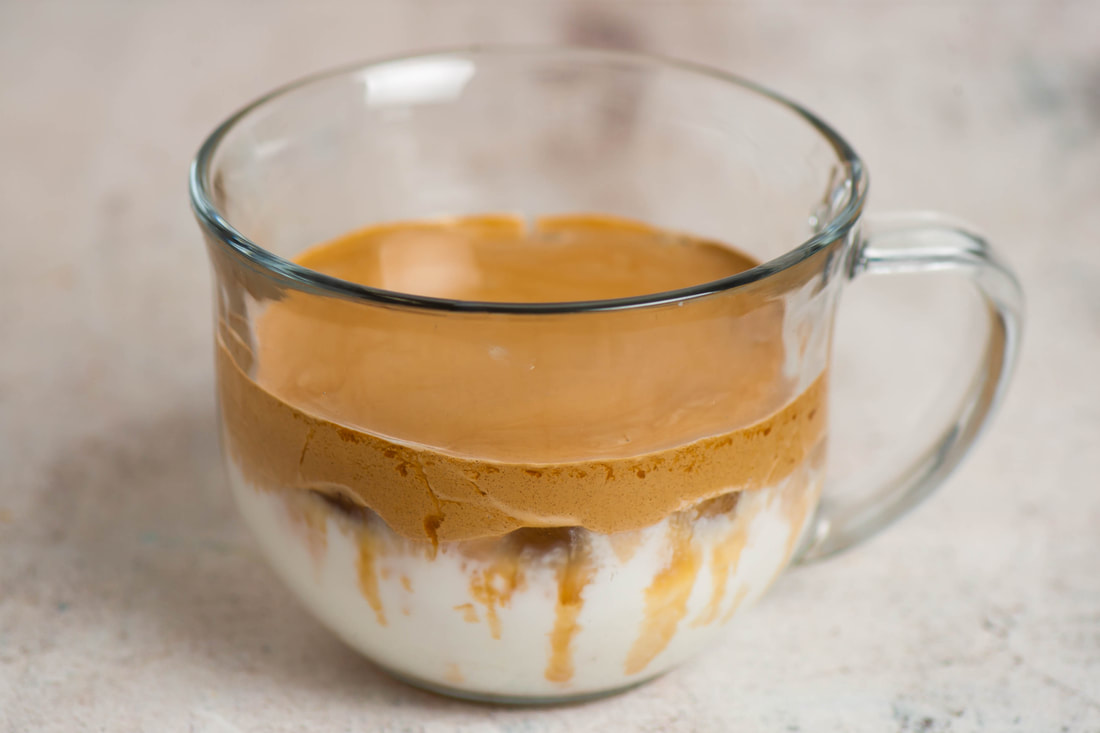
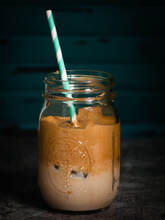
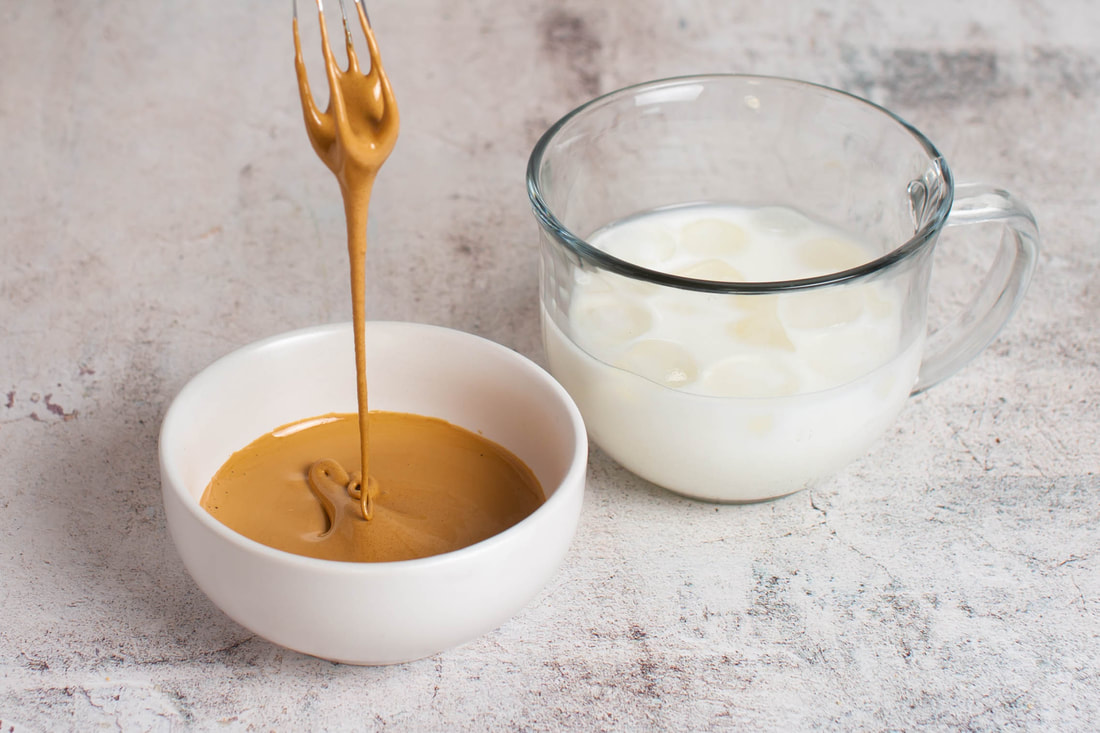 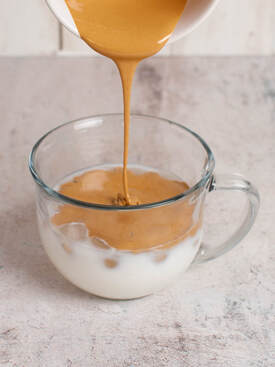 It's a crazy time right now and I hope this finds you and your family well. During this time of staying in and staying safe, we are all faced with many different challenges; working from home, teaching, maybe going out in the world to work as an essential worker... lots of struggles. We all deserve an indulgent treat! I found a recipe for whipped coffee and as a coffee lover I HAD to try it. As a home baker, I had to add on to it! Below is the original recipe and my "Next Level Whipped Coffee" recipe. Enjoy and let me know what you think! Stay safe and do your part by staying in when you can. Original Whipped Coffee Ingredients: 2 TBSP instant coffee 2 TBSP packed brown sugar 2 TBSP BOILING water 1 cup milk 1/2 cup ice Directions: Combine coffee, sugar and BOILING water. Whisk together until whipped texture is achieved (if whisking by hand, about 7-10 minutes but I used a cake mixer to save time). Once whisked, scoop over ice and milk in glass. You can mix to combine in glass and enjoy! Next Level Whipped Coffee: Ingredients: 2 TBSP instant coffee 2 TBSP packed brown sugar 1/4 TSP cinnamon 1/2 TSP vanilla extract 2 TBSP BOILING water 1 cup milk 1/2 cup ice Directions: Combine coffee, sugar, cinnamon, vanilla and BOILING water. Whisk together until whipped texture is achieved. Once whisked, scoop over ice and milk in glass. You can mix to combine in glass and enjoy! NOTE: The water you use really does need to be boiling. If the water isn't boiling, it won't be hot enough to melt the sugar and you won't get a smooth consistency. And speaking of sugar, you can also use white sugar if you don't have brown sugar handy. ENJOY!
So, I may be rushing this Halloween theme but after this week, I needed this drink, and the cool glasses I found at Home Goods were a perfect touch!  You Just Need 3 Simple Ingredients Yes, only three simple but delicious ingredients in this super-yummy drink:
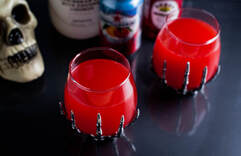 Whether you're recovering from a long, trying week or
just relaxing around the house, this drink is light, delicious and easy to mix. Try it for yourself and leave a comment to let me know what you think!  Fudge. Decadent, rich, creamy and delicious. Excuse me while I wipe the drool from my chin… I don’t know many people who don’t like fudge. I am certainly not that person, which is why I was beyond delighted to meet with KT, the Kiltman himself, Kevin Thompson; visionary and founder of Shenanicandies. What does Shenanicandies make? You guessed it; FUDGE. But not just fudge, Funache. 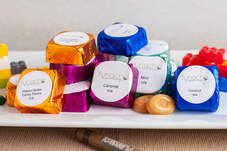 What is Funache? I’m glad you asked! Funache is somewhere between a fudge and a ganache. It is solid feeling and looking like a fudge as the foil wrapper is removed. That is where the fudge resemblance ends. It is smooth and creamy as it melts in your mouth. As the chocolate subsides, the subtle flavor comes to life. And what flavor! Kevin uses a wide variety of liquors to flavor Funache, from simple schnapps and cordials to single malts, absinthe and a 25-year-old Armagnac. This is a candy to experience and savor!
Kevin hasn’t left out the kiddos, however. He has developed Ultra Funache which is made from extracts and other non-alcohol flavors, so it is 100% kid-friendly. It is just as creamy, smooth and delicious as its predecessor, but without the fun stuff, I mean, with out the alcohol. The sweetest part of Ultra Funache is that 10% of the purchase price of every box of Ultra Funache will be donated to local Youth Organizations. How can you taste some of this dreamy chocolate for yourself? You can visit https://shenanicandies.com/ to place your first of many orders or you can catch the Kiltman while he is out and about at his next fair venue. He is at Old Rochester Regional Junior High School every Tuesday and Sundays at Stony Creek Farm in Swansea. You can view his full schedule at Facebook.com/funache. Samples won't be necessary, you will fall in love with magic and madness of Shenanicandies! 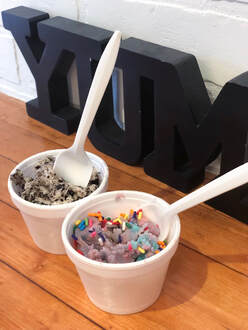 If you are like me, or ANY kid for that matter, you have been told countless times "don't eat that raw dough, it's bad for you" when you were a kid. Then you snuck a scoop to eat anyway. If you are a parent you have probably even said it to your own children (and snuck a nibble when they weren't looking). Well, I am pleased to tell you that you no longer have to deny your dough cravings or tell your kids they can't have any either... DOUGH has opened its doors at 48 Main Street in Fairhaven. I am not going to lie; I have been waiting for this moment! My mini-me and I went immediately after supper on opening day to check it out. We were not disappointed. We arrived just after 7:00. The owner and her staff were still all smiles, even after a long and busy first day. They were disappointed to inform us that they were out of a couple of flavors but I was happy they had such a successful first day. I loved the vibe of Dough right away; the cute, clean, shabby-chic ice parlor feel is very fun and welcoming. There is seating inside as well. We were offered samples of any flavor we wanted to try, but let's be honest, I KNEW it was going to be good! We chose Unicorn Magic and Cookies & Cream. So. Good. 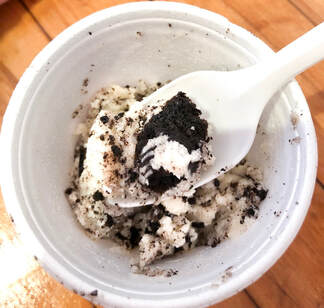 Dough offers a variety of toppings for their delicious edible dough and even gluten free options! You can also opt for ice cream if you are looking for a cool treat on a hot day. I don't think there are any bad choices here and you should make your way there to check it out for yourself. When you visit, be sure to comment below and tell me what flavor you chose and what you thought! 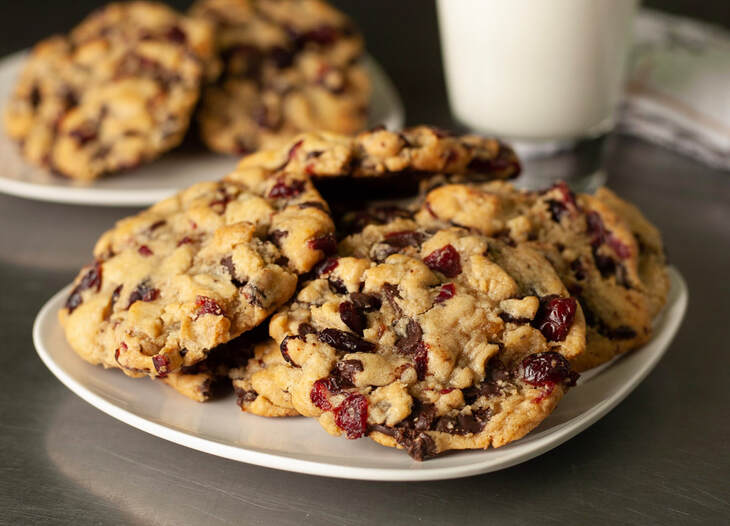 There’s something to be said about the magic of a chocolate chip (or insert your favorite flavor here) cookie. It has the magic to lift a bad mood, elicit a smile and build a new friendship. And no one knows this better than my new friend, owner and operator of Mad Good Cookies, Jon Piwowarczyk. If you haven’t tried one of his Mad Good Cookies yet, I suggest you immediately go to his website (https://mgcookie.com/) and place your first order! As an expert in cookies, I can tell you they are amazing! I had the pleasure of meeting with Jon this weekend and was lucky enough to get a behind-the-scenes glimpse at his cookie - making - magic. Jon hasn't always been in the baking cookies business, but life has a way of steering us in directions we don't always understand at first. I can say, anyone who has had a Mad Good Cookie is thankful for the change in business direction. Mad Good Cookies offers a wide variety of flavors and more are being developed every day. The most popular seem to be the classic chocolate chip, white chocolate chip with cranberries and cookies and cream (all my personal favorites). Jon has been honing his recipes and developing his business for years. As we spoke, however, I didn’t need to ask Jon what his favorite part of the business is. I heard many stories of the letters his cookie fans have sent him. They seem to be his pride and joy, almost as much as the cookies themselves. The letters all express two sentiments; a love for the cookies and gratitude of kindness from the man who made them. It is so secret Jon puts 100% of himself into his cookies and his customers. Jon can be found either in the kitchen baking and developing new flavors or at vendor fairs and shows meeting people and introducing them to his cookies. If you can't find him, however, never fear. You can order cookies from his website and have them delivered to your home! Jon also offers the opportunity to join his cookie club and have the newest and most popular flavors delivered to you or a loved one automatically every month! If you want to be kept in the inner cookie circle, you can also join Mad Good Cookie's email list and never miss what's new! 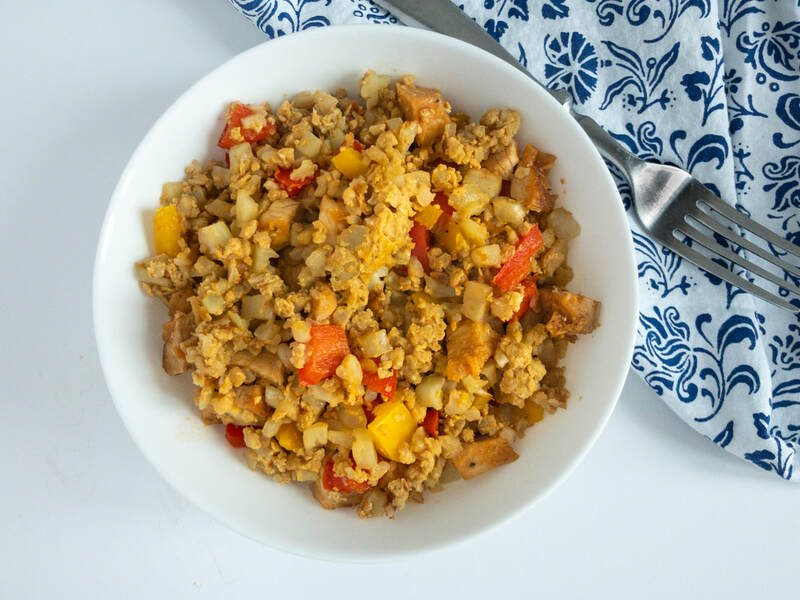  This REALLY Surprised Me... With the signs of spring showing in my yard (robins, tulips and budding lilac bushes) I decide to take my healthy-eating a little more seriously to get in shape for spring/ summer fashions. Oh yeah, I want to be "healthy", too. I decided to try something new. I love fried rice but it doesn't really fit in my new "healthier" diet. I had some ingredients in my fridge that I thought might pacify my craving so I threw them together. 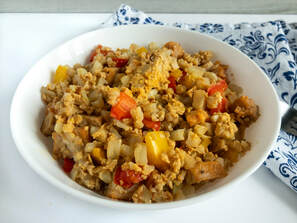 I grabbed:
1/2 red pepper (chopped) 1/2 yellow pepper (chopped) about 1/2 cup chopped, cooked chicken about 1 cup of finely chopped cauliflower (yes, I did say "cauliflower") 1 egg 1-2 teaspoons of soy sauce 1/2 teaspoon of garlic salt to taste (optional) 1-2 tablespoons of oil To start, chop the peppers into small pieces. You'll use about 1/2 of each pepper for this. Now would be a great time to add an onion if you have one, but I didn't at the time. You would use 1/4-1/2 an onion depending on the size. Next, sauté the peppers (and onion if you're including it) in a pan with your favorite cooking oil and garlic salt. Add 1 tsp of soy sauce to start, the cauliflower, chicken and egg. Cook until combined and egg is fully cooked. Add the remaining soy sauce if desired. I was shocked that this was not only not bad but GOOD! It's also a great grain-free alternative to fried rice. Let me know if you make this and what you think! Edible Glitter?? Yes Please!If you scour Pinterest like I do, you may have stumbled upon a post that reads something like "Oh my God, I just died... DIY edible glitter". Well, I have to admit, my inner child screamed with joy when I read that. Then, I read the "recipe" and knowing what I know about baking and cooking, I was skeptical but I wanted to be hopeful. I had to put this to the test. You won't want to miss these results. 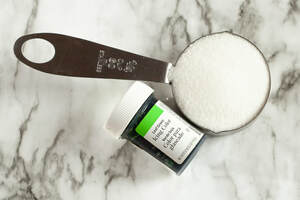 People use what's known as "click bait" in the subject titles all the time just to get viewers to open their posts. Could this just be click bait? IS it possible to make edible glitter? I HAD to find out. The recipe called for 1/2 cup of sugar and 5-10 drops of food coloring. I used 1/4 cup of sugar and a few drops of food coloring because if this was a fail I didn't want to waste more ingredients than I needed to. 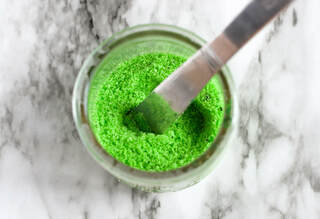 The recipe then said to mix the sugar and food coloring, spread on a cookie sheet and bake at 350 degrees for 10 minutes. Then, break up and bake another 10 minutes. Let's give it a shot! I wasn't sure exactly how this was going to work. Heat makes sugar melt. Would it miraculously make it shiny first? I didn't think so... 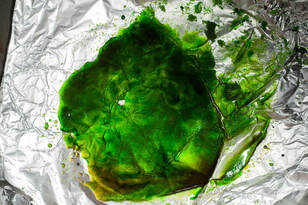 It melted... Into a mess... I'm glad I put the sugar on top of some aluminum foil or I would have had a ruined cookie sheet on my hands. 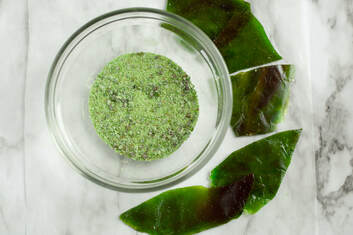 I let the "glitter" mess cool and then I broke it up. I tried grinding some into small glitter- sized pieces and while it is slightly reflective, I can safely say this is NOT home made edible glitter. All is not lost however. This could be useful in some of your decorating. If you use blue food coloring this could be ice or water. This would also nice geode shards for geode cakes, which are extremely popular now. 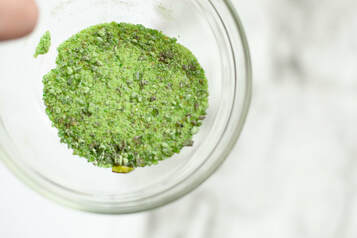 I will continue my quest for DIY edible
glitter and keep you posted if and when I am successful. Just goes to show, I guess you can't believe everything you read on the internet. 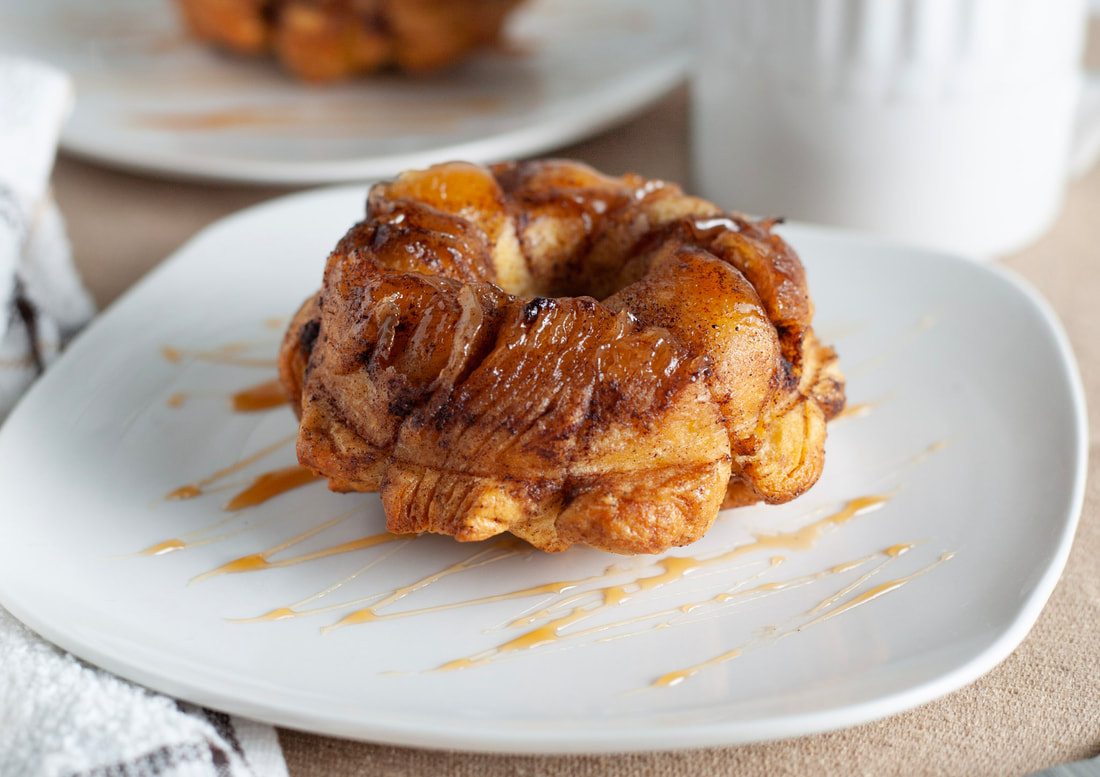 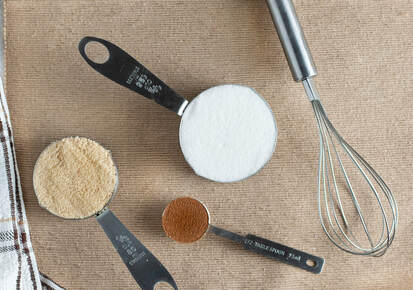 So I just started making this recipe a month or so ago and I have been requested to make multiple times since. It never lasts for very long when I make it and I'm lucky if I get A lot of recipes I found for monkey bread are for THREE tubes of ready to bake biscuits which is fine if you're hosting a huge party but if its Sunday afternoon and you want to make a simple, delicious treat for your family, this is the recipe for you! My boys don't actually like their monkey bread too sweet but if your family loves the sweetness, you may want to increase the sugar amount below to 3/4 cup- 1 cup. I also really like making my monkey bread in silicone donut molds. I find they cook quicker, more evenly and you end up with a single serve size treat. Enjoy! (Start by pre-heating your oven to 350 degrees) Ingredients: *1 can/ tube of pre-made biscuits. (Most recipes with steer you away from the flaky biscuits but to be honest, Iused them once by accident and I really liked it!) *1/2 cup of granulated sugar *1/4 of packed brown sugar *1 tsp- 1/2 tbl of cinnamon (I always use 1/2 tbl but not everyone loves cinnamon as much as I do) *1 stick of butter (unsalted) donut mold or small bunt pan. To start, cut the biscuits into 8ths. I like to use my bench scraper to section out my biscuits instead of a knife. It's much easier. Next, melt the butter. You can do this on the stove but it's much easier to use a glass bowl and the microwave. Then add in the dry ingredients to the butter. After the sweet buttery mixture is made, you'll need to smoosh the sectioned biscuit pieces into a ball-like shape, Some recipes tell you to roll them into balls but if dough gets worked too much it can become tough. Then you'll want to coat the biscuit balls with the mixture and pack into the molds. You'll want to divide the remaining mixture into the molds. I find this amount makes 5 servings when you pack the molds tightly. Place the mold on a baking sheet to avoid spill over. Bake at 350 degrees for 20 minutes to start. Bake until tops are golden brown. Let cool before removing from molds and enjoy! 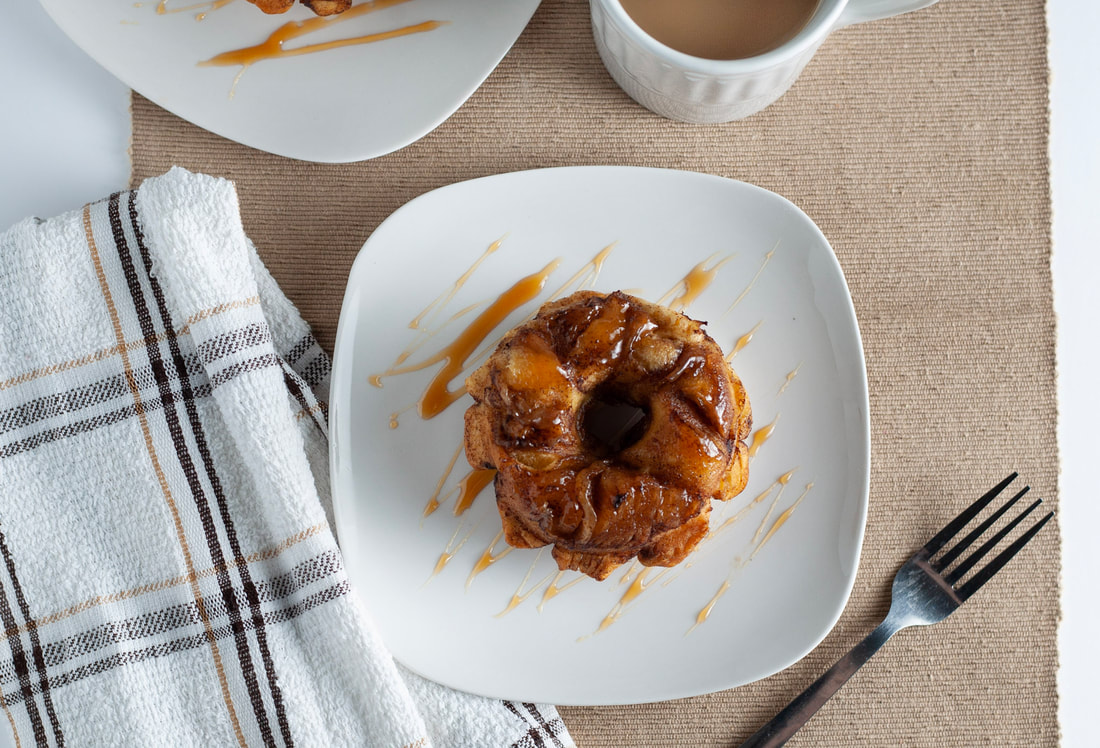
|
by Kelly SmithI am a photographer who loves to bake (and eat)! Join me as I share some of my favorite recipes and local New England food. Archives
April 2020
Categories |

 RSS Feed
